DIY SOLAR PANEL GROUND MOUNTING
Posted by Signature Solar on 12th Aug 2021
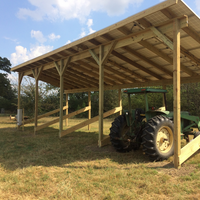
Here are some photos of a few of the solar racks we have built.


As you can see, the construction is simple and we think it is a useful and low-maintenance design. It allows maximum access to the panel electrical connections and maximum natural cooling for the panels, and of course, it does not require drilling holes in an existing roof. Wires are kept out of the way using small wire management clips, found here.
Our customers have used this design as a shed to store vehicles, tractors, livestock, and a variety of other materials. We have even made a triple-header rack that is about 30’ deep. You can easily run cross members between the posts and attach sheet metal to any of the sides. Of course, you can also change the height of the structure as needed by using longer or shorter vertical posts. The structure is made of treated lumber with 6 x 6 vertical posts that are usually either 12’ or 16’ long. 2 x 10s are used for the headers and the rafters, with 2 x 4s placed off-center on top of the rafters. Rafters can be notched on top of the headers with a birds-mouth cut, as in home construction. The posts are sunk into 3’ deep holes filled with concrete. This gives above ground header heights of 9’ and 13’. The difference in the height of the headers results in an 18 degree angle, which is close to optimal solar production for Texas since our greatest electrical demand is in the summer. Of course, a steeper slope might be more optimal for more northern latitudes, but it does not matter as much as you might think.
You can go to pvwatts.nrel.gov on line to test solar production at different angles in your location. Also, you are only giving up about 20 percent of possible solar production by having fixed versus rotating panels. The maintenance is a lot less and you end up with a useful structure. We usually place the posts of each header 16’ apart side to side to give room for a carport bay, and the two headers are also placed 16’ apart from front to back. This meets 2 x 10 spanning requirements and allows for using 20’ or 24’ long 2 x 10 rafters if you want some overhang. Panels are 39” deep in the landscape position, so a rack 7 rows deep would allow about a 3’ overhang past the headers at the top and bottom. This gives a depth of 19’ to the back wall available for storage.
The solar panels form the roof of the structure, with a generous amount of clear caulk between the joints. We usually place the panels in the landscape position, with two rafters under each vertical column of panels. The rafters are placed ¼ and ¾ of the way across the panel so they will be lined up with the center of gravity of each half of the panel. The off-center placement of the 2 x 4s on top of the rafters allows us 2” to shoot a self-tapping screw through the 2 x 4 into the bottom flange of the solar panel. Each panel is attached to a rafter at 4 points along its frame, two on each side.
We hope this helps give you ideas for designing your own solar rack.
**please note, you will be tapping the screws through the wood into the metal frame.

